Gordon Robertson

Motorcycle Tank Bag Cooler
The Project In Short
This was my capstone design project for my thermal design class. In a group of four, we had to design a cooler that fits in a motorcycle's tank bag
-
It had to work all-day
-
It should require minimal installation
-
It has to keep food at safe temperatures

Analyzing the Problem
We broke the problem down into a few key requirements
-
It had to keep the food at <6℃ per FDA standards
-
It had to have an internal space of 10x10x7.5cm to fit two sandwiches
-
It had to use less than 100W of power

Analyzing the Problem
A tank bag on a motorcycle
We looked at the market and the weather in popular areas for motorcycles day trips
-
There are no portable minifridges for motorcycle tank bags
-
In June in Texas, it gets over 38℃ for roughly two hours on average
-
Solar radiation at that time is around 10 kWh/m2
-
We use the dimensions of the 6 most popular tank bags to determine our product's maximum dimensions: 21x21x20cm

Temperature data for Texas
The Design

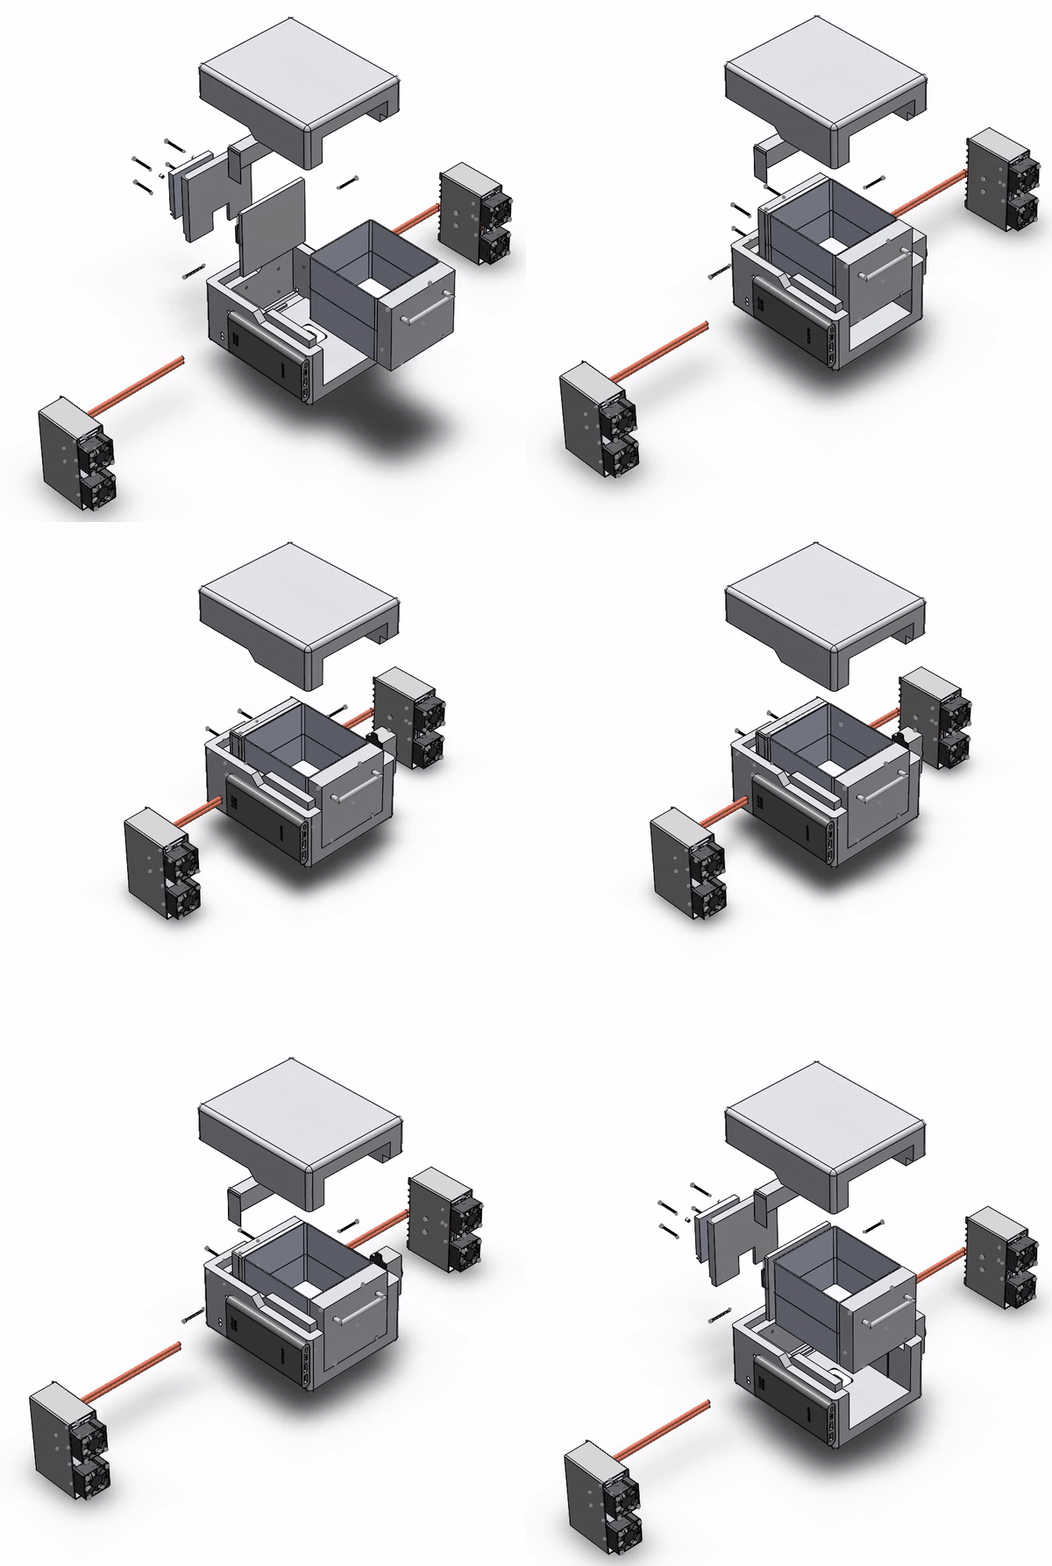
The design is split into three major components: the interior assembly, the heat sinks, and the removable tray.

The interior assembly is made of inch thick Styrofoam. It uses a Peltier device controlled by a capillary sensor to cool the tray.

The tray is small and portable but can fit two sandwhiches.

The design is split into three major components: the interior assembly, the heat sinks, and the removable tray.
For each assembly, we analyzed the thermal system within and matched it to products, determining which Peltier device, heat sinks, fans, and heat pipes we would need.
We used Ansys to perform transient and steady-state thermal analysis on the empty, half-filled, and filled tray to analyze the temperature of the food.
We found that this design worked well unless the tray was filled with room temperature food, in which case it could struggle to cool it fast enough.
Design Specifics
To provide instructions on how to build the cooler, I worked tirelessly to source every part and create a CAD model that is sufficiently detailed.
I spent hours in Solidworks writing instructions on how and where each and every part went.
Limitations and Next Steps
This design is far from perfect and we found the following problems that we would attempt to fix with more iterations.
-
After sourcing the materials and estimating the labor costs for one prototype, we found it would take upwards of $600 to make one.
-
The user still has to drill holes for the heat sinks, which could be harder than anticipated
-
The location of the heat pipes is not adjustable
-
We could not test this on a motorcycle and do not have a good estimate of its resistance to vibrations.
Final Thoughts
Prior to this project, I had had little exposure to thermal design beyond the concepts of thermodynamics. It was a very fun time working to wrap my head around the new information I was learning and also figuring out how to apply to the real world.
I put a lot of effort into making this design real and trying to work within the design constraints we were given. Fortunately, the countless late nights paid off and during the capstone project design expo, we won the award for Most Innovative Design.
If I was given the opportunity to jump on a similar project, I would jump at the chance if not just to apply the many lessons I learned in this one and see how much better of a design I could make.